
 The holidays are over and you made it through. The holiday meals were great, even though everyone ate too much. Not everybody saved room for pie. Those who did ate only the middle, leaving big hunks of pie crust on their plates like discarded pizza crusts. Even you noticed that the crust was a bit tough. You vow that next year will be different... but how?
A pie crust (pâte brisée in French) is easy to make.
I know people who are afraid to attempt a home made pie crust; I know others who think it’s too much trouble. Many of these fine folks – both in the US and in France – will purchase a frozen crust in the supermarket rather than attempt to make one from scratch. Some of the store-bought shells are okay, but what is the point of going to all the trouble to make a spectacular home made pie filling only to have it sit in a mediocre crust? Would you make your own crust and then pour in filling from a can? Okay, maybe you would. But still, there is something quite satisfying about making your own delicious pie with a tasty and flakey crust that your friends and family will savor. You may not do it every time, but you just might.
I know that people have been making, and not buying, pie crusts for centuries. They have not had, like us, the advice of countless celebrity chefs, the work-saving food processor or even exorbitantly priced baking lessons. They’ve done it in ridiculously small kitchens without fancy marble or granite countertops. They’ve done it while cooking three meals a day for hungry spouses and children. They’ve done it as part of everyday meal-making and not just for special occasions and holiday feasts. And, if they have done it, why can’t we? The answer is that we can. Making pie crust is basic; it’s easy and it’s worth the time it takes. No, really, it is.
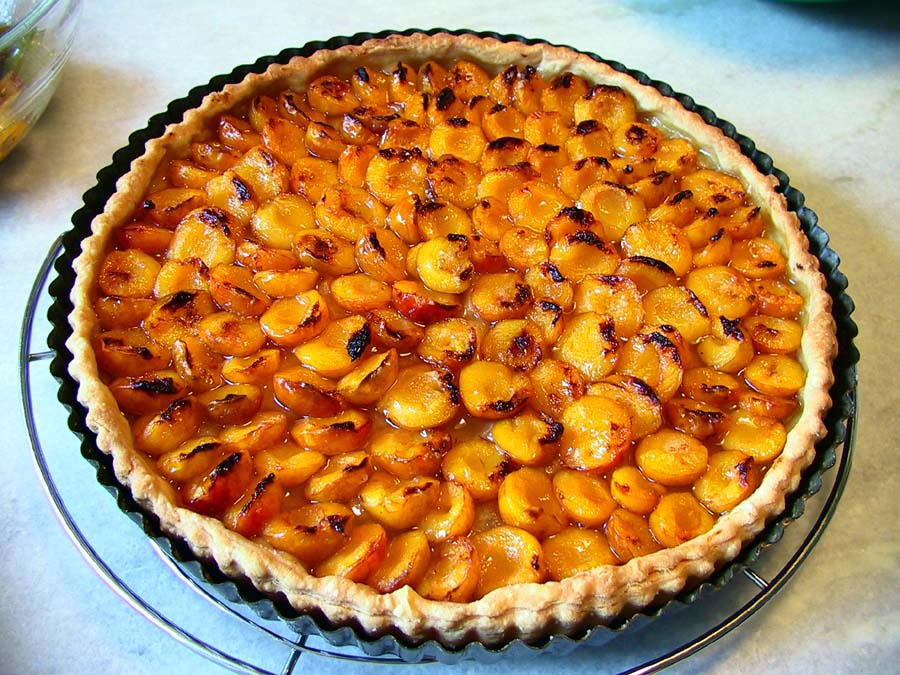
Tarte aux prunes (plum tart)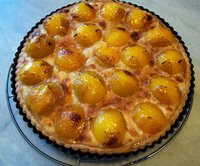

I started making pie crusts in the late 70s when I had moved out my parents’ house and was learning to cook for myself. I remember that my grandmother’s apple pies were great, and even though I still got to eat them, I wanted to learn to make my own. I watched Gram when I could. She always used Crisco for her crusts, and my first crusts were laden with the white stuff as well. I tried to copy her technique, but she went very fast. For reasons I would only later learn, the crusts I made were heavy, not flakey like Gram’s, and baked into hard dome-shaped shells that required a jackhammer to puncture. The bottom crusts were soggy. They were flavorless and mostly inedible. After a few frustrating attempts, my pie making became a once-a-year event and the results were always the same.
Fast-forward a few years. I had spent a year in France and fell in love with tartes, the French fruit pies with only a bottom crust and beautifully arranged fruit on top. The crusts had flavor! These were not simple shells made to hold something tasty; they were tasty in their own right. I needed to learn how to make these.
After moving to California in the mid 80s, I tried again. I watched Julia Child, Martha Stewart and Jaques Pépin on television. I read recipe after recipe. I learned to add salt to the dough and I made the switch from Crisco to sweet, unsalted butter. The flavor was better but my crusts were as hard and brittle as ever. I was doing something wrong, but what?
I started to listen to what the chefs said about gluten. Webster’s New Universal Unabridged Dictionary defines gluten as: “a gray, sticky, nutritious substance, found in the flour of wheat and other grain, which gives dough its tough, elastic quality.” If not respected, the chefs said, gluten will make your dough hard and brittle. Aha! Gluten needs to rest, early and often. I experimented with letting the dough rest and, lo and behold, the pie crusts got flakier and tastier.
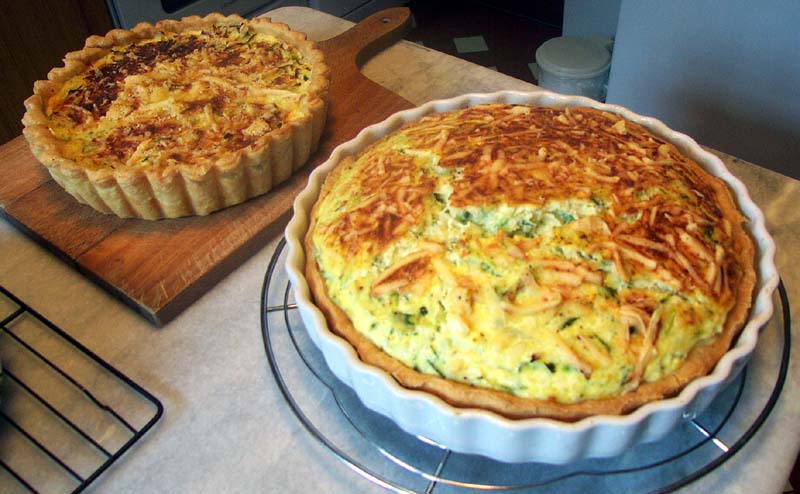 Quiches with grated zucchini and gruyère cheese.
Now, many years and pies later, I think I have it mastered. I make crusts much more frequently than I ever did. My pies get rave reviews, both the fillings and the crusts. I use my crust recipe to make both sweet (apple, pear, plum, pumpkin) and savory (quiche, meat, spinach) pies, and disappointments are few. I freeze leftover scraps of uncooked dough in freezer bags until there is enough for another pie. After thawing, there is no loss of quality. I’ve
even ventured into pâte feuilletée, puff pastry, but that’s another story.
Tarte aux courgettes (Zucchini pie)
Here we go:
The primary ingredient for a good pie crust is patience. You need time: time for the crust to rest between steps, time for the gluten you’ve activated to relax so your dough will not become tough. With the right amount of time and by keeping your butter and water cold, you can’t lose. Work the time into your schedule; you don’t have to make the pie all at once.
Here’s my basic recipe for a one-crust pie (see notes below for a two-crust pie):
Place a cupful of water in your freezer. Then, in a food processor, combine:
1 ¼ cups (about 180 g) of all purpose flour
¼ tsp salt or less, to taste
1 stick (¼ lb. or about 125 g) cold unsalted butter, cut into 8 or 10 small pieces
Process by pulsing at first, then full blast, until the butter is chopped finely into the flour. Don’t go too far, just enough so that the butter is still in pieces but evenly incorporated. This should take about 5 to 15 seconds. Next, continue to process while slowly adding:
About ¼ cup (about 50 ml) ice cold water (that you put in the freezer earlier)
until the mixture comes together and sticks loosely to the blade. This should take less than 10 seconds. You may need more or less water, depending on the day. This only means that it depends on the flour, moisture content of the butter, relative humidity and other factors that you can’t control and needn’t worry about. Just add cold water slowly until the dough comes together. If you add too much water, you will end up with a soggy mess, and a tough crust.
Take the dough out of the processor and place it on a floured sheet of wax paper. Lightly sprinkle the top of the dough with flour, press it into a disk shape, fold the wax paper around the dough and put it into the refrigerator for at least 30 minutes. This time gives the gluten in the dough a chance to rest and relax (become less tough) and gives you a chance to clean up or work on something else. At this stage the crust will wait for you, even until the next day.
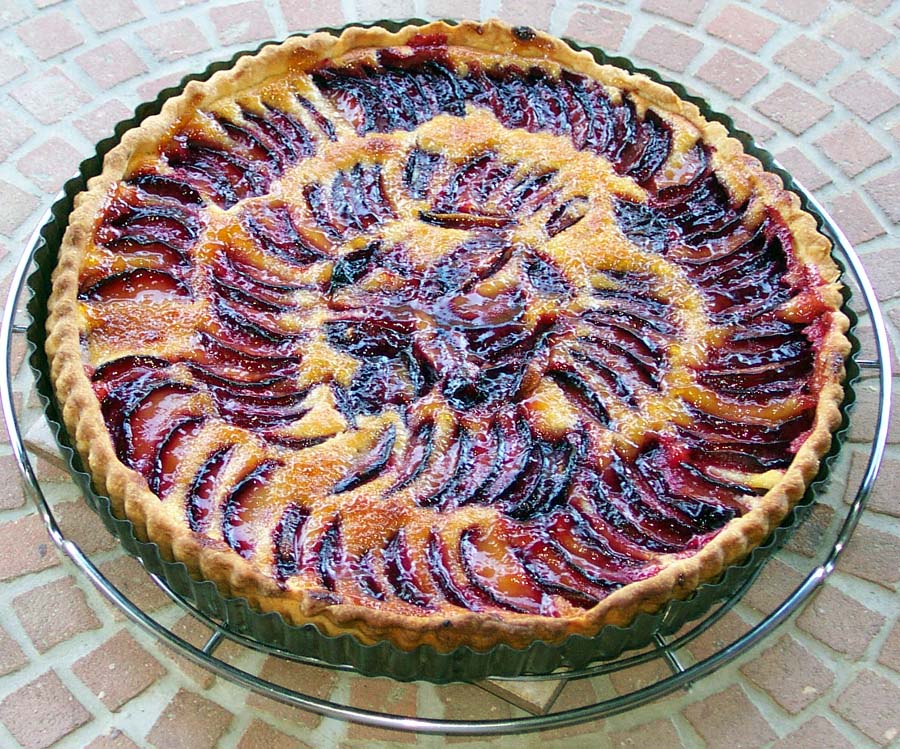
 Tarte aux mirabelles (mirabelle plum tart; plums from the neighbors' yard)
After the dough has rested, take it out of the refrigerator and roll it out on a floured surface into the desired shape (if it’s been in there for more than a couple of hours, let it sit on the counter for about 5 minutes before rolling, but keep it cold; don’t let it get up to room temperature).
Tarte aux prunes (sliced plum tarte)
No matter what your pie recipe says, always put the dough in a buttered and floured pie plate, tart pan, or whatever you will bake it in. And always, after you line the pan with the dough, place the empty shell back in the refrigerator for at least 20 minutes before baking. Again, this lets the gluten in the dough rest and become less tough, keeps the butter cold, and gives you a chance to work on preparing the filling. It also gives you time to pre-heat the oven.
Blind-baking a one-crust pie/tart usually results in a crust that is crispier, flakier, and not soggy on the bottom. Blind-baking is easy. Cut a piece of kitchen parchment a bit larger than the diameter of your pie pan and fit it onto the crust covering the bottom and sides; the paper should be higher than the sides of the pie plate. Fill the parchment-covered crust with ceramic or metal pie weights, or dried beans, and then bake for 20 to 30 minutes at 350ºF, or 180ºC. Don’t let it get too brown at this stage. Let the crust cool a bit before removing the weights and paper. Then fill and bake again according to your recipe.
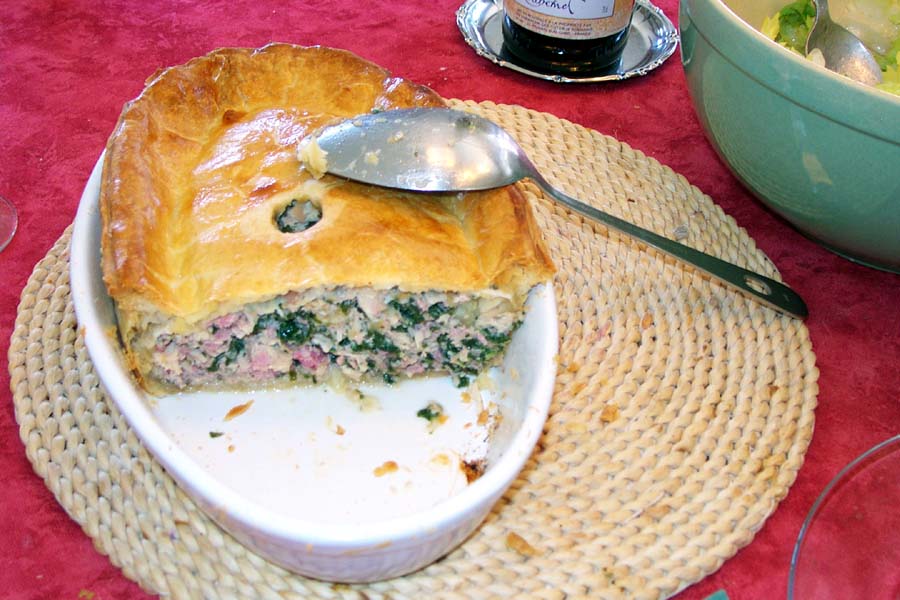
Tourte lorraine (veal and spinach pie)
Notes:
To make a two-crust pie, double the recipe. Freeze any left-over dough scraps for later use. There will always be left-over dough. Roll out the top crust after you’ve put the bottom crust in the fridge. Gently fold it into quarters and place it in waxed paper in the fridge to rest. When you’ve filled the pie, unfold the top crust onto the filling and seal. Don’t blind-bake the bottom of a 2 crust pie.
If you don’t have a food processor, pile the flour on your counter, cut in the butter, make a well and add the water a bit at a time. Mix and press with your hands until it comes together. It WILL come together.
Keep the butter and water cold. Refrigerate the crust between steps until it’s baked.
Click on any of the above photos for a larger view.


Hi Walt,
ReplyDeleteI love your directions for pate brisée- I can't wait to try them out. Well, actually I'll need to wait at least a month while I try and lose these Christmas pounds.
I think that you and Ken are better cooks than Alton Brown even.
A belated Happy Birthday to the beautiful Collette!
Amitiés,
Evelyn in 'Bama
Wow, this post goes back awhile...I got the link from Chez Loulou.
ReplyDeleteI too am an unabashed user of ready-made crusts...here in France. I think the "pur beurre" ones that you can get in the "rayon frais" are actually quite good. But the ones I've found in Olympia have been lardy and generally poor excuses for crusts.
I KNOW, I KNOW, certainly not as good as yours, but as you said, yours does take time.
I'm so glad I found your blog! I was searching for a helpful pate brisee recipe and this one will do perfectly. My mom is an amazing cook/baker who passed her love onto me but she rarely made pies because she hated messing with pie crusts, so I've always had the idea that they're really tricky. I've been wanting to make quiche lately, so I'm putting those notions aside and diving in today. Thanks for sharing!
ReplyDelete